【學習筆記】 初探 Stripe:第三方金流串接

A. Introduction
Stripe 是一家線上付款服務提供商,協助個人或公司在網路上接受付款服務。
其特點主要如下:
- 介面簡潔
- 支援站內付款(不需跳轉頁面,如:PayPal)
- 支援超過 30 種語言、135 種貨幣,包含加密貨幣
- 目前支援八種支付方式,如:信用卡、簽帳金融卡、銀行轉帳、數位錢包等
B. Online Payments
Stripe 提供一系列的收款服務:
- Stripe Payment Links:客戶可直接點擊產品的付款連結,填寫資料即完成支付
- Stripe Elements:能夠自行設計付款頁面的樣式,鑲嵌在網頁中
- Stripe Checkout:透過 Client SDK,直接應用 Stripe 預製的托管支付頁面
- Stripe Connect:提供更多功能,如:快速註冊、全球收款、以本地貨幣向全球付款(提現)等
- Stripe Invoicing:能夠自訂 Stripe 賬單,直接向客戶收款
- Stripe Billing:能夠自訂頻率和計費方式,進行定期重複的收款
也可以直接使用 API 或是 SDKs,套用至自訂的 UI 介面,可參考以下文件:
- Stripe API:https://stripe.com/docs/api
- Stripe SDKs:https://stripe.com/docs/js
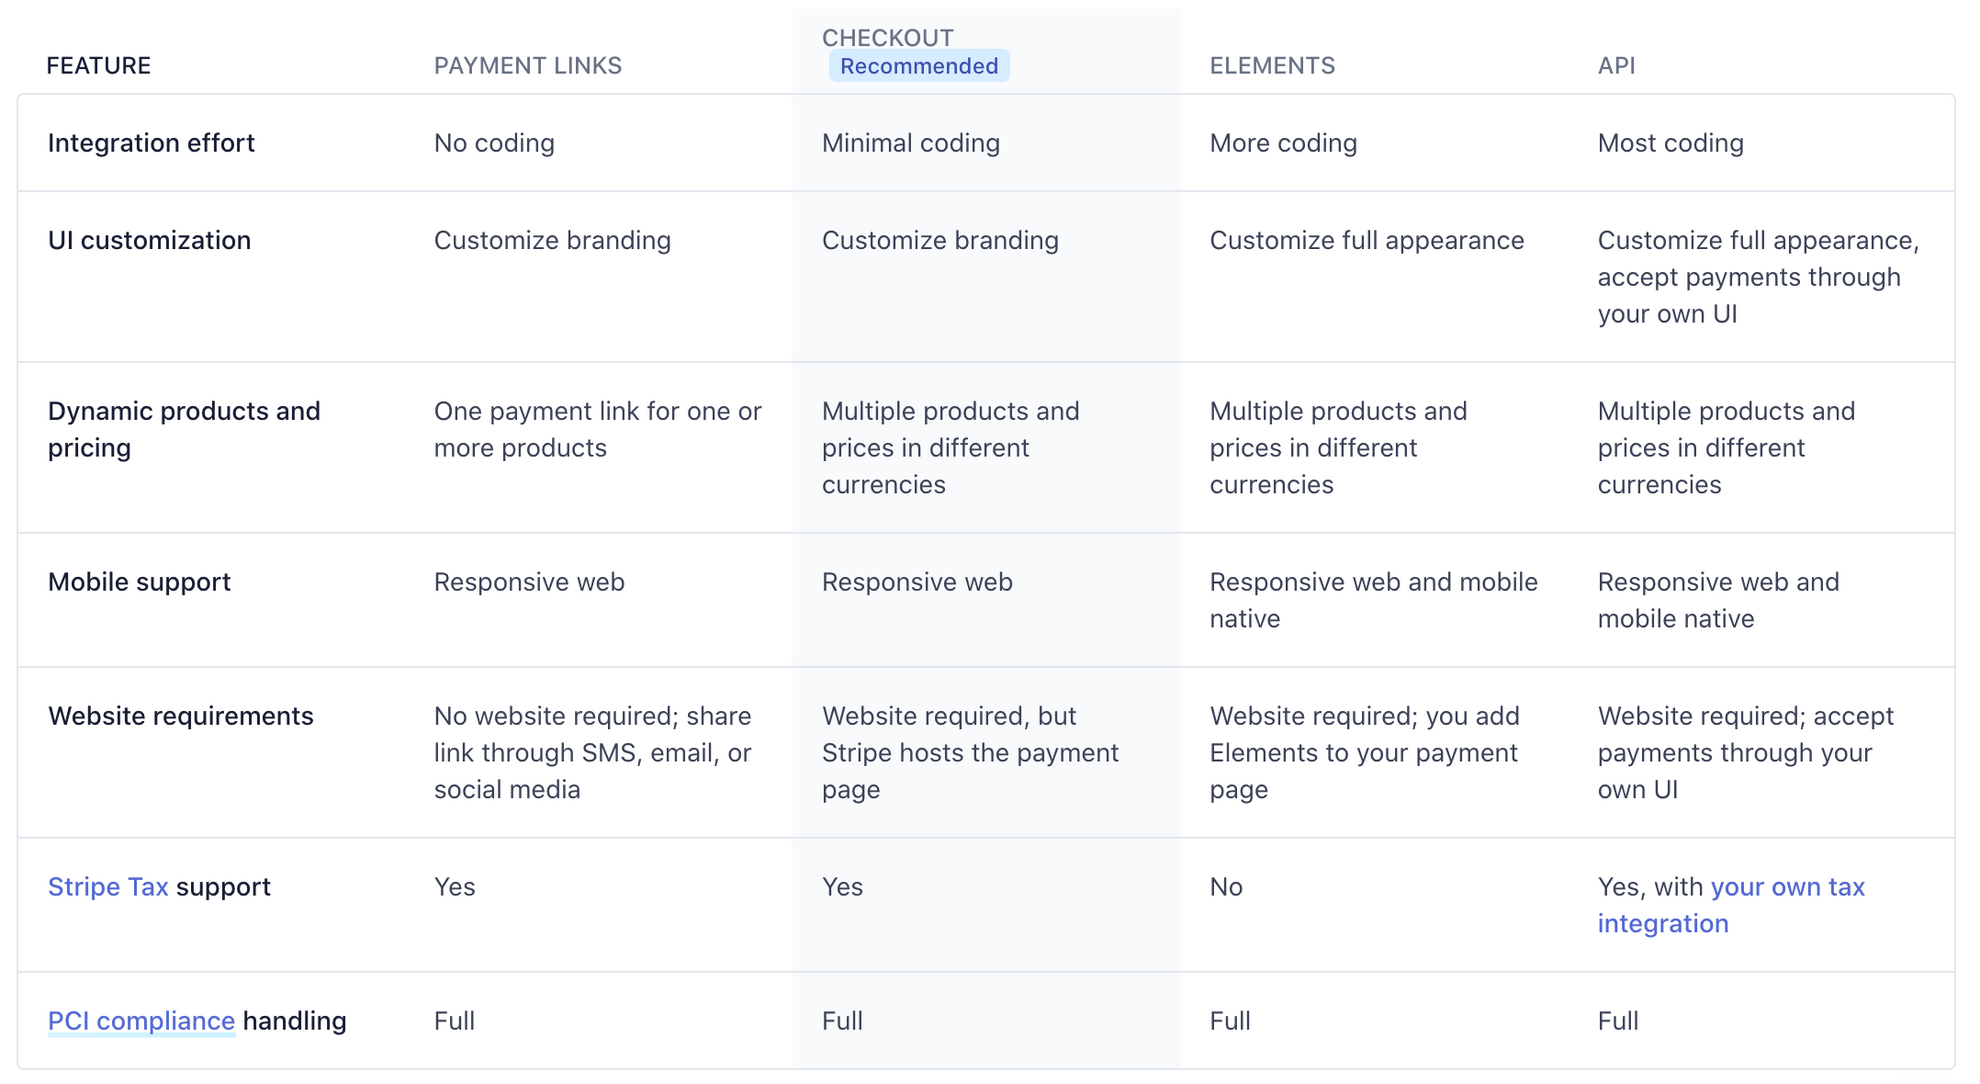
下圖是官網列出不同服務的特點與差異:
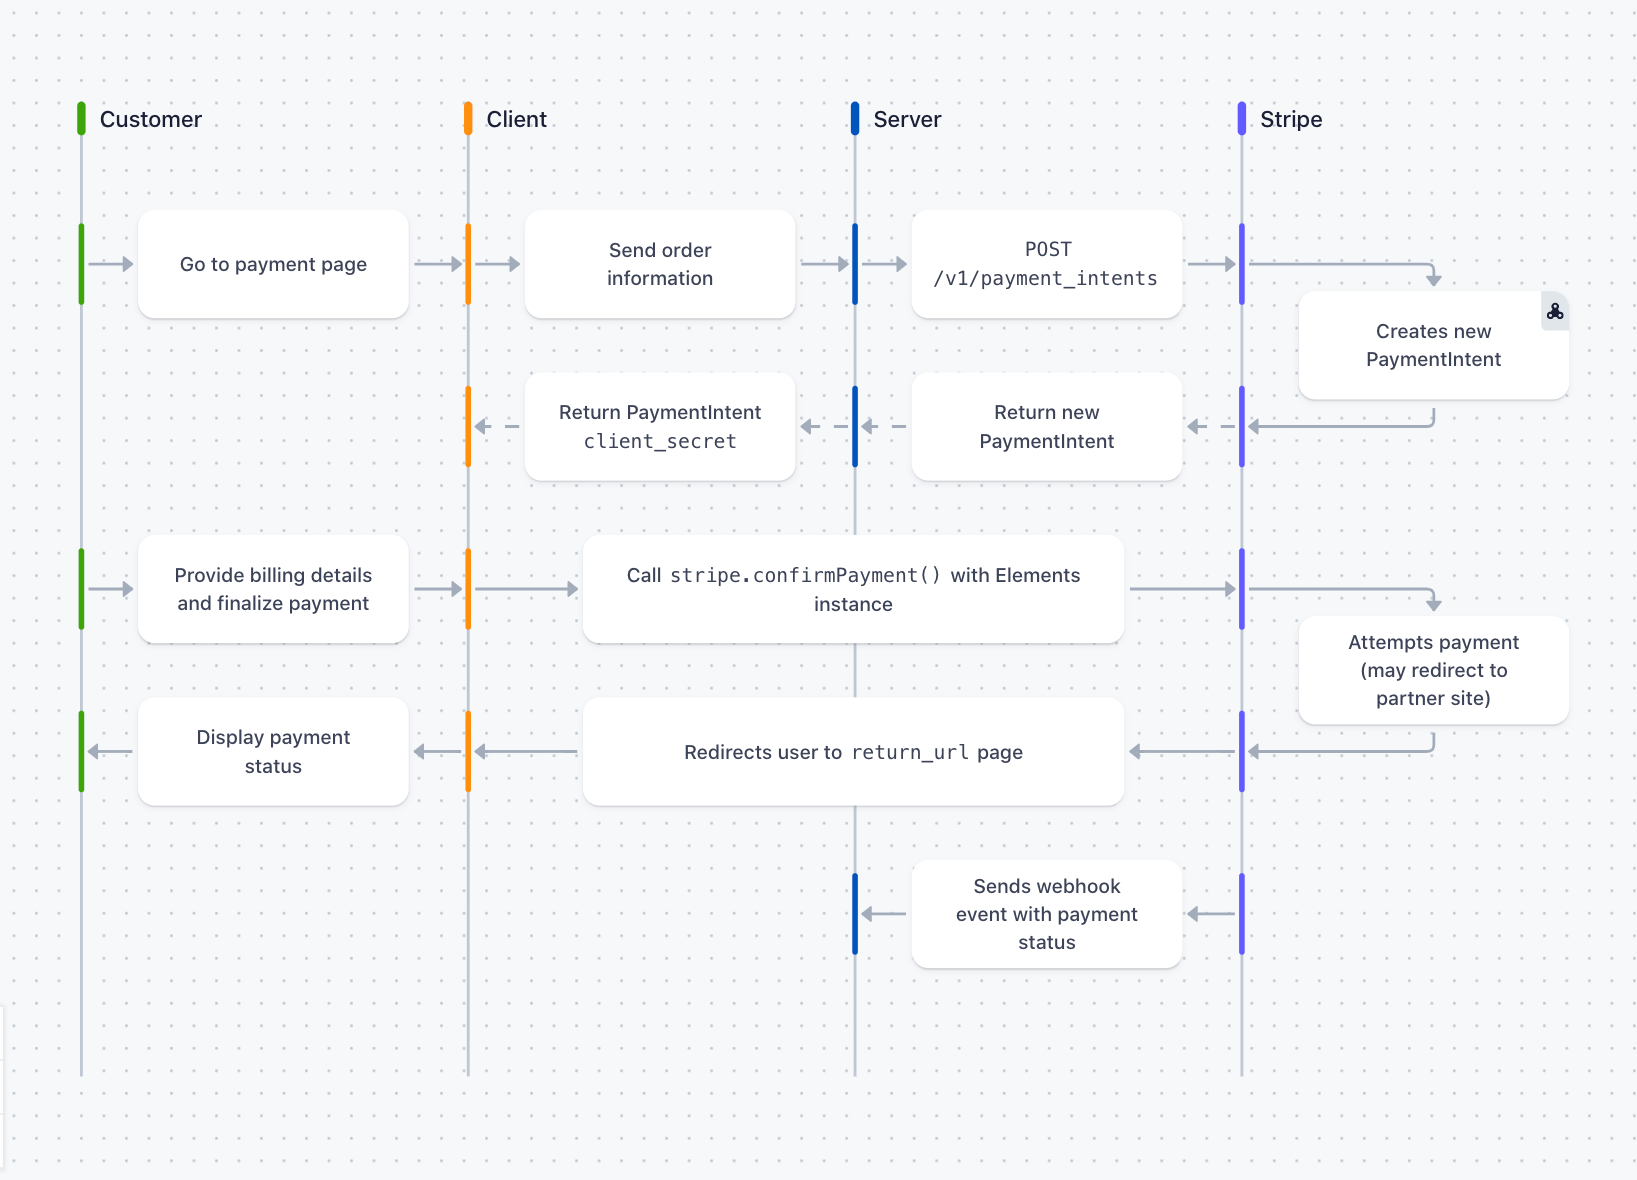
C. Payment Flow
- Client-side:將使用者的交易細節送至 Stripe 處理驗證,確認後會回傳一組 token(基於 PCI Compliance 支付安全規範,開發者不會儲存任何用戶的信用卡資料)
- Server-side:將這組 token 送至 Server 進行後續驗證流程
可參考官網的 Payment Intent 流程圖:
D. Sample Code
以下是官網提供的 GitHub Repo 範例:
- accept-a-payment:Learn how to accept a payment from customers around the world with a variety of payment methods
- checkout-single-subscription:Learn how to combine Checkout and Billing for fast subscription pages
- checkout-one-time-payments:Use Checkout to quickly collect one-time payments
接著會簡單介紹 Payment Links、Subscriptions、Stripe Elements 這三種付款服務:
D-1. Payment Links 付款連結
有兩種方式能夠建立商品的付款連結:
- 直接在 Stripe 網站建立
- 透過程式碼
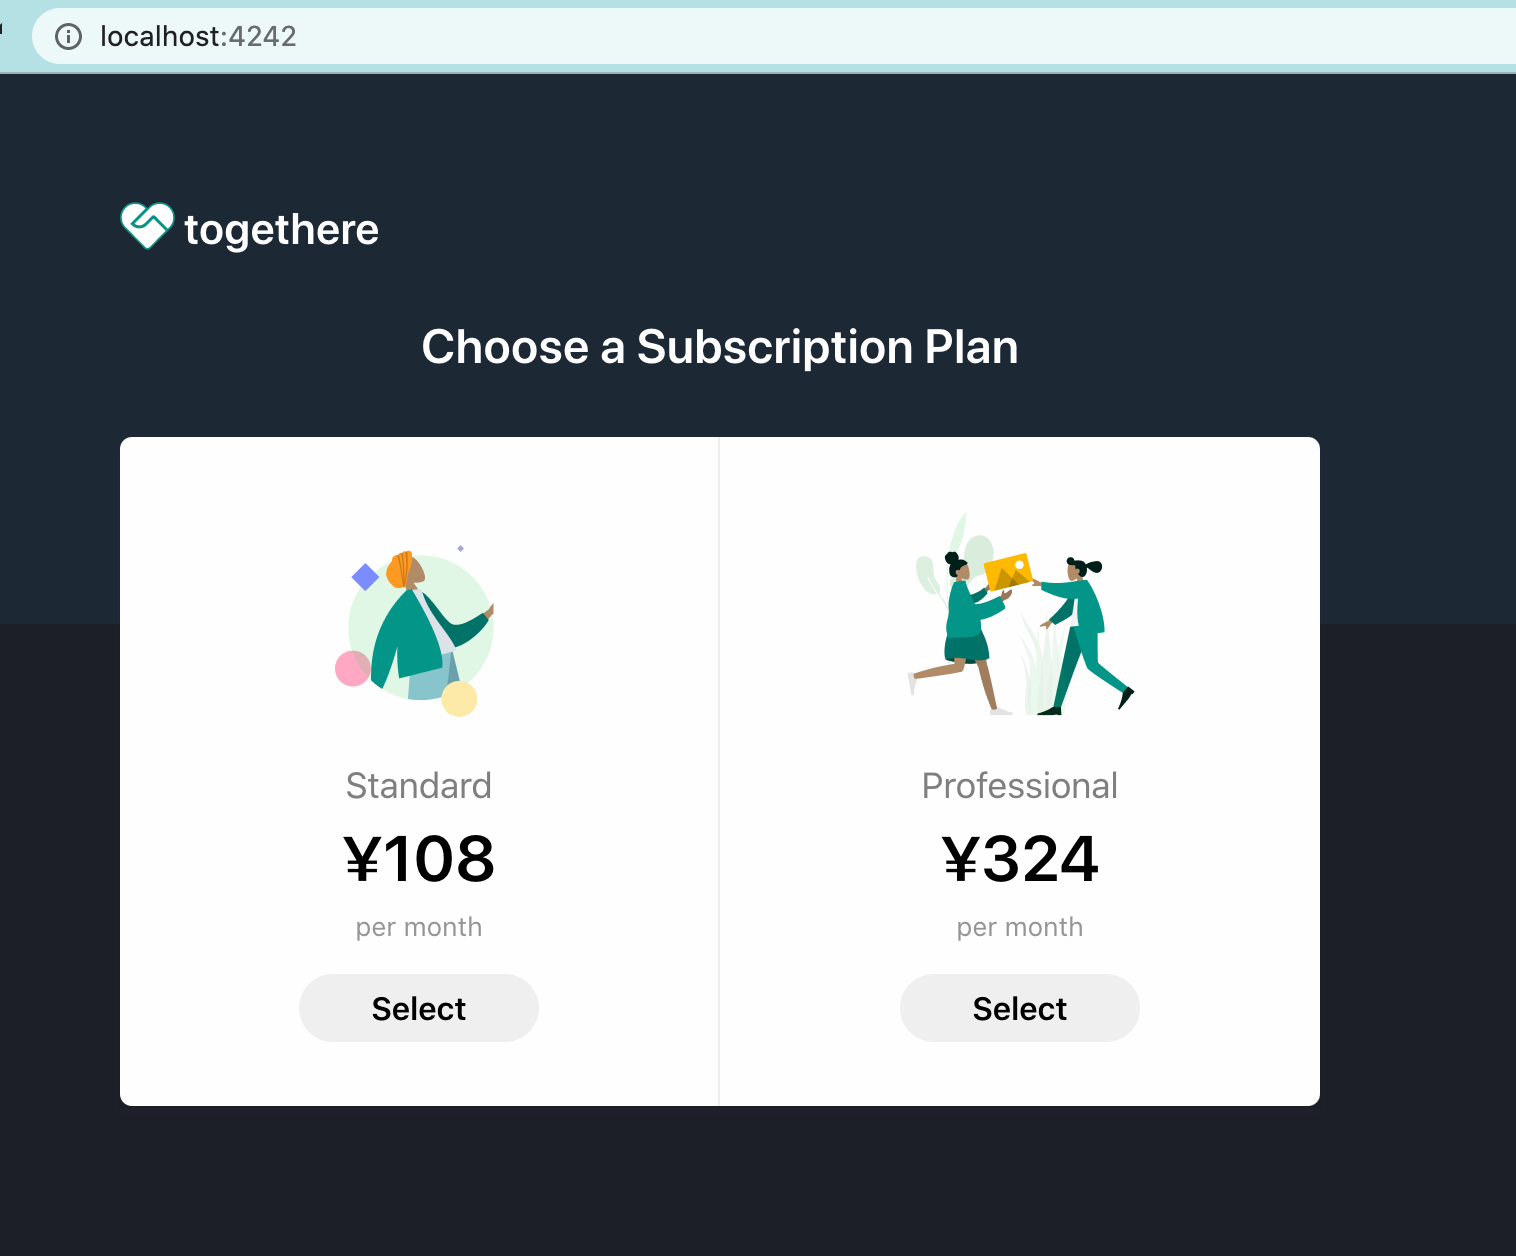
(1) Create Links by Payment links page
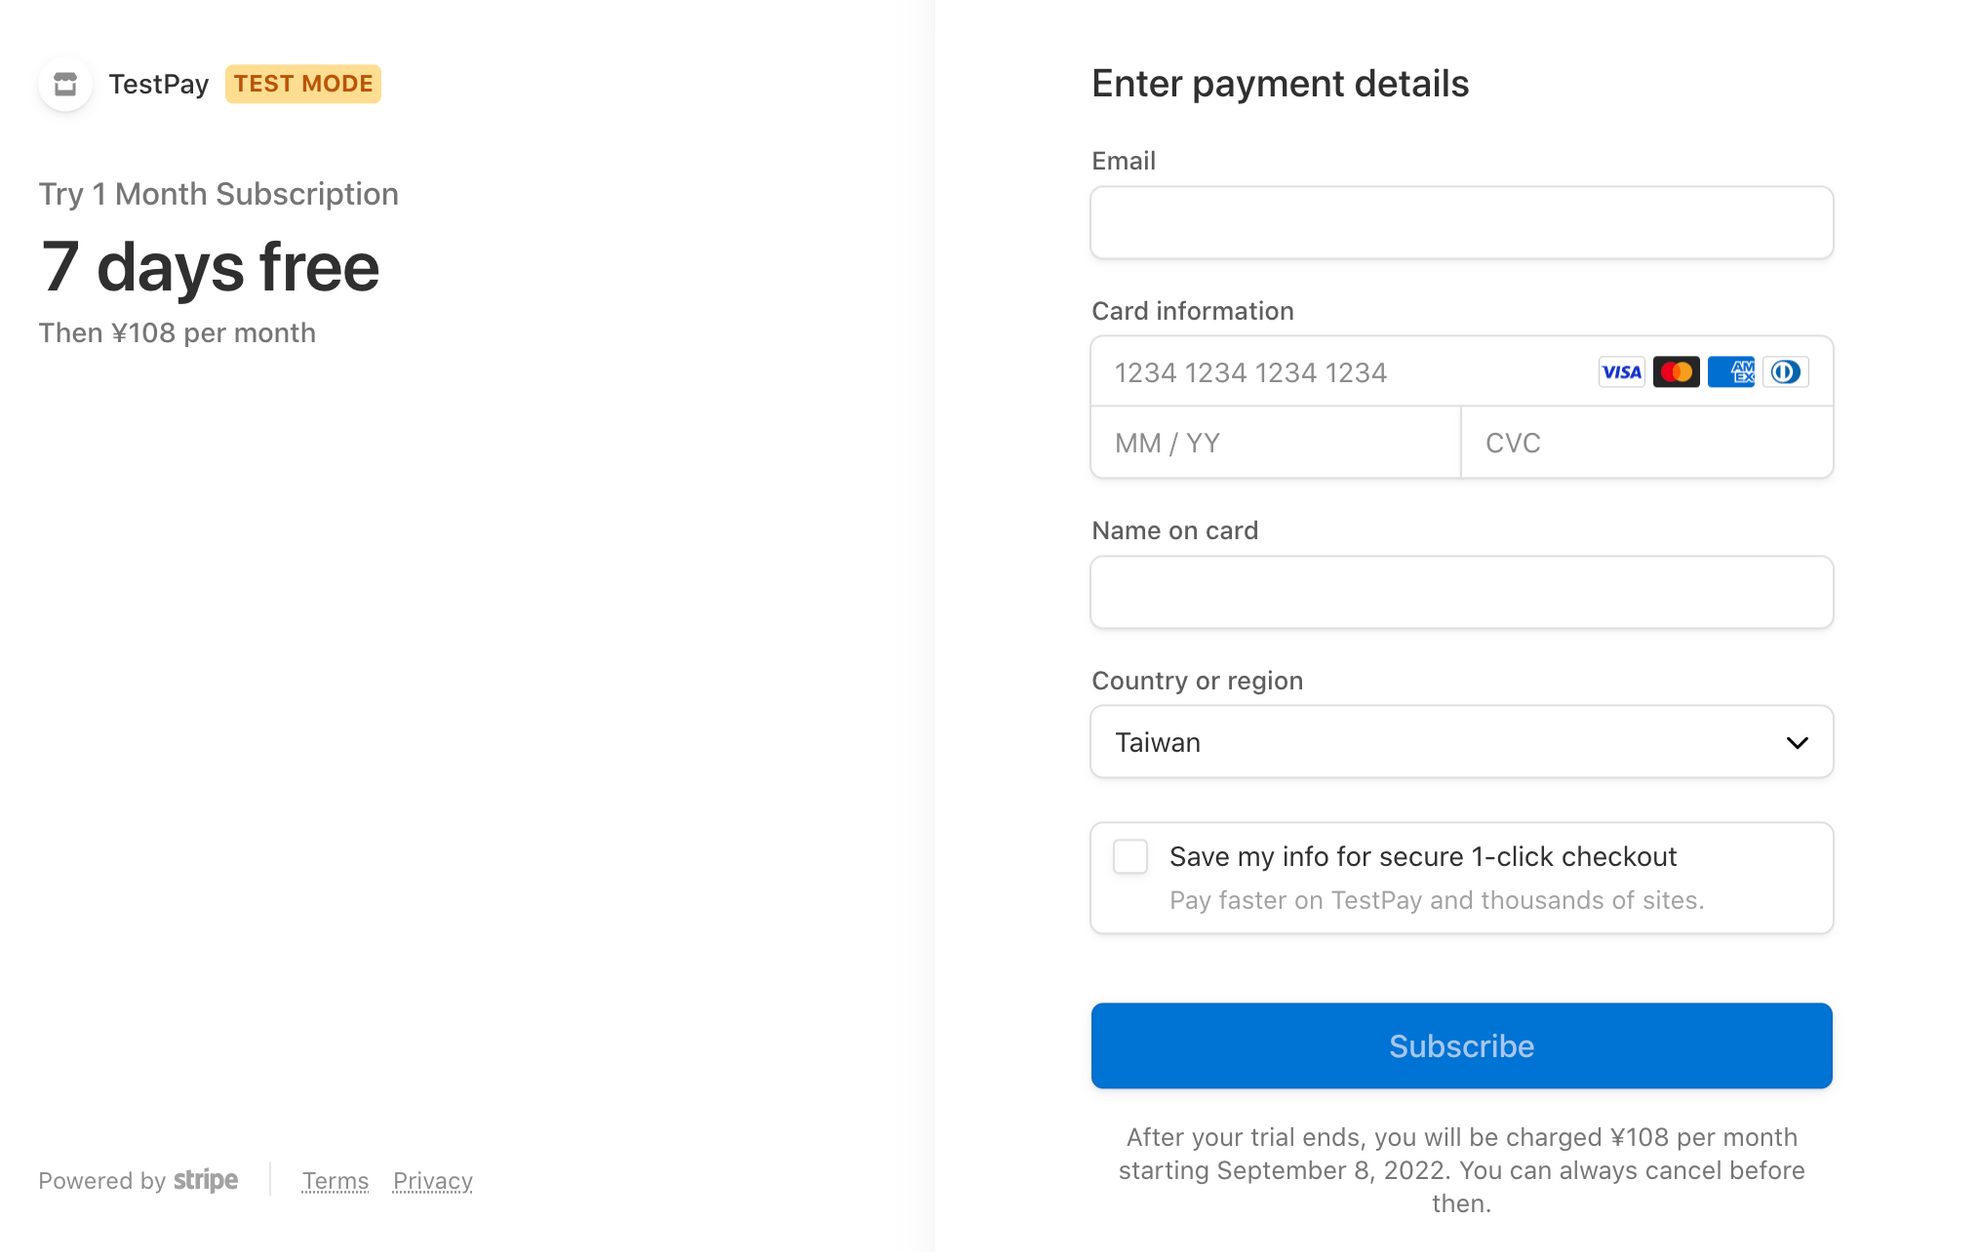
• 直接在線上建立商品付款頁面,可參考 DEMO For 1 month subscription
(2) Create a payment link with the Payment Links API
- 每次發送 API 時,均需帶上 Secret Key,可從 Dashboard > API keys 頁面取得
- 首先新增商品項目,response 會得到商品
PRODUCT_ID
1 | const stripe = require('stripe')('sk_test_51LcngPAAS0stR7a9fGwPc85JbiYhAxIkP0pS32PLpuy00joiHlGYEeO9NQEpyPSWnOATsSGU5LeL0tlFTegi5MbI00r1YKjzMX'); |
- 制定商品價格、數量、支付方式、為一次性購買或是訂閱制等細節
1 | // Set your secret key. Remember to switch to your live secret key in production. |
- 傳入剛才新增的商品
PRICE_ID,即可建立交易連結
1 | // Set your secret key. Remember to switch to your live secret key in production. |
- 在客戶完成購買後,可決定是否進行導頁或顯示訊息
1 | // Set your secret key. Remember to switch to your live secret key in production. |
- Test Cards 測試信用卡號可參考:https://stripe.com/docs/testing
D-2. Subscription 訂閱制
參考 https://github.com/stripe-samples/checkout-single-subscription 範例,可實作訂閱付款:
透過調整 .env 檔案中的 PRICE_ID,可決定要連結的商品:
1 | # Stripe subscription data |
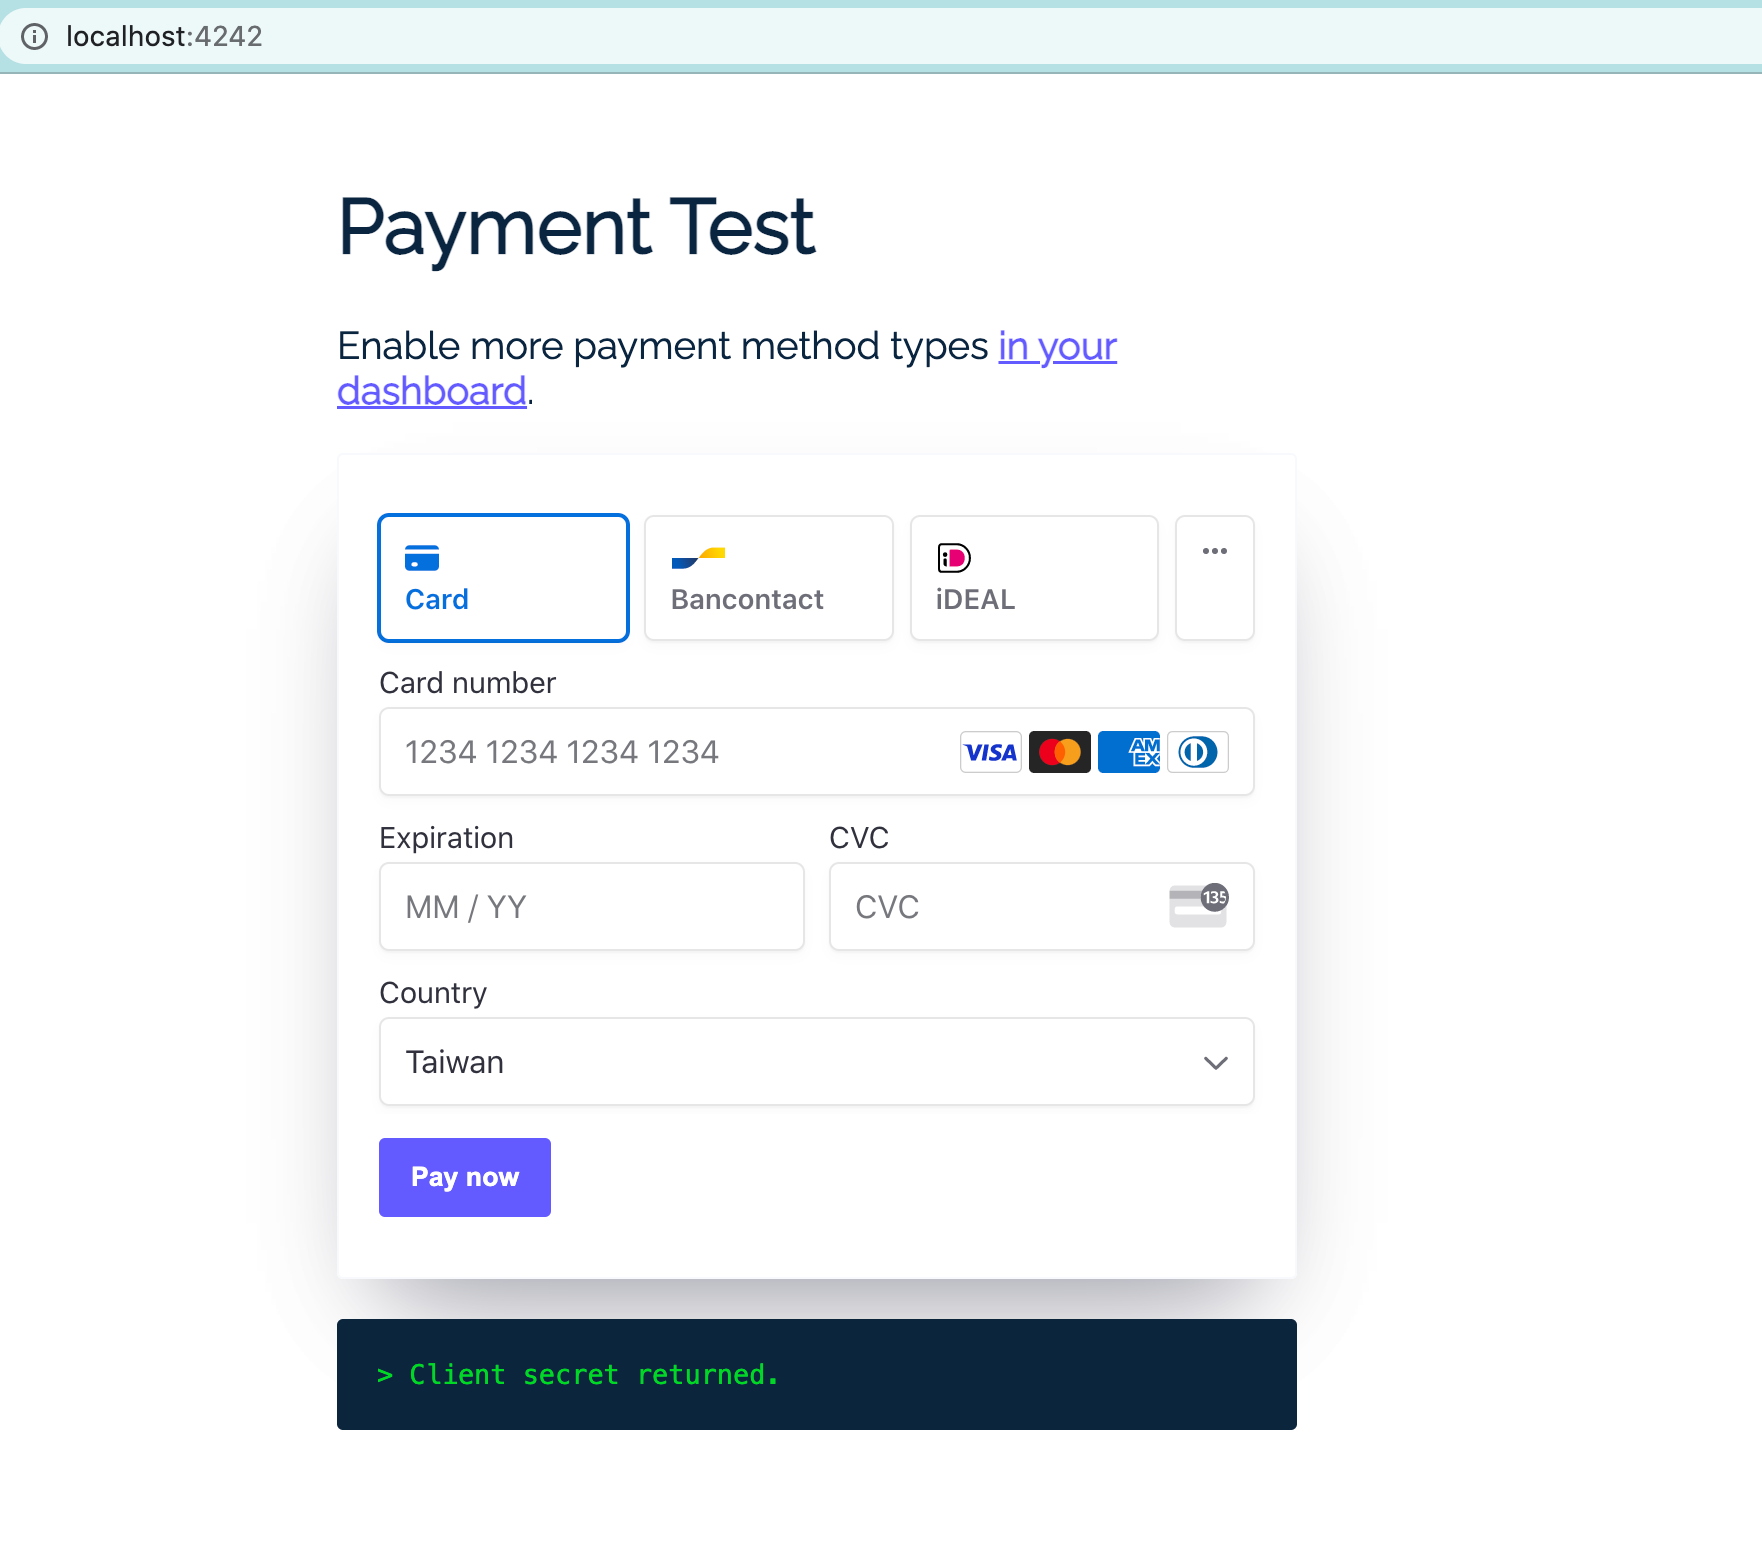
點擊後會導頁至 Stripe 的輸入付款資訊頁:

D-3. 使用 Stripe Elements 鑲嵌在網頁
以上兩種方式,在付款時均會外開一個 Stripe 網頁。
根據不同需求,也可以將付款表單內嵌到自己的網頁上進行付款:
- 首先建立一個 payment form
1 | <form id="payment-form"> |
- 透過
clientSecret參數帶入客戶的相關資訊:
1 | const options = { |
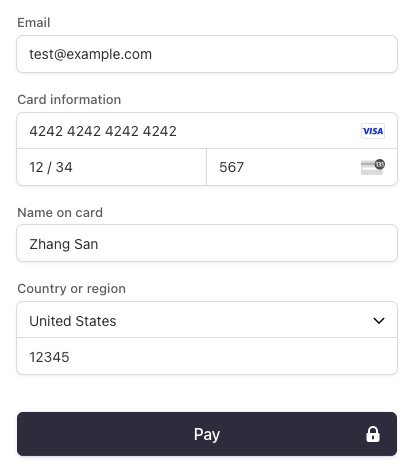
示意圖如下,客戶可選擇自行付款方式:
E. Conclusion
過去比較常聽到綠界、Paypal 等金流服務,這次因為專案需求,第一次接觸到 Stripe 這家公司。
參考幾篇介紹,都形容 Stripe API 非常簡易好上手,最初在閱讀官方文件時,其實有點搞不清楚幾種付款服務的差異在哪,會想一次通盤瞭解;但跟著範例實作後,會發現其實觀念大同小異。
Stripe 還有提供 Dashboard 能夠進行後台管理,提供 API 或 No Code 的方式給用戶使用,即使不熟後端語言,也能夠快速上手。
F. Reference
- Stripe 串金流教學(上) - Yuanchieh’s Blog
- Stripe 串接 - 本書簡介
- [實作筆記] Stripe 串接
- Stripe 金流串起來 - iT 邦幫忙
- DEMO:angular-stripe-integration